Services
A service is generally a technical part of your system or other components of your organization that incidents can occur on. They should represent a real component in your organization. Services put together allow you to map and digitize your bare system and delegate issues occuring on them to the appropriate responders. You can integrate with monitoring tools that you use on your real services with TaskCall's digitized services so that when alerts are raised by them, incidents are created in TaskCall and you can get more context on the incident and bring in the appropriate responders.
For example, an online store may have a payments gateway to handle their payments. By creating a service on TaskCall called "Payments Gateway" and integrating with your monitoring tools, you will be able to pipe all critical events occuring on your real payments gateway and get a digital overview of the incidents occurring on it and assign them to the correct team.
Create New Service
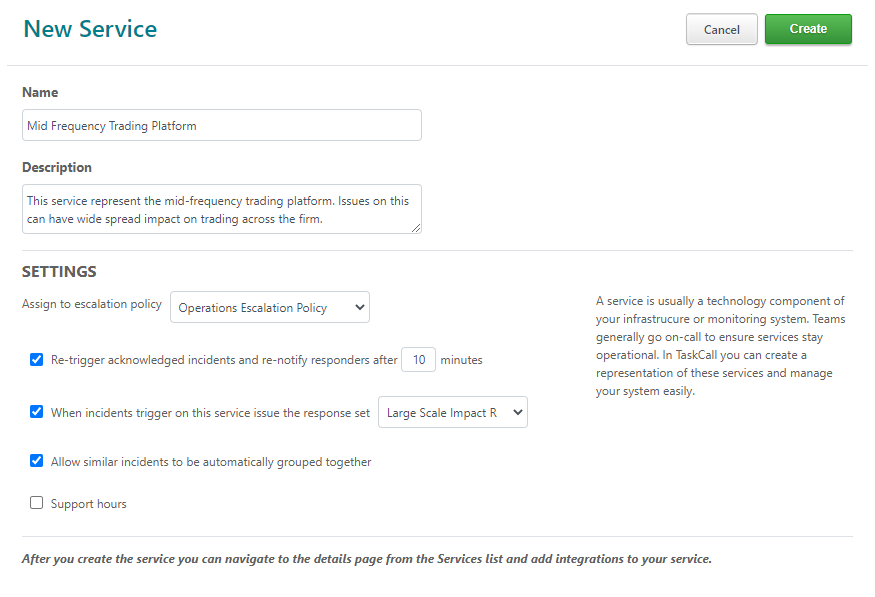
To create a service:
- Go to: Configurations > Services > New Service
- Give the service a name and describe what it is for. It is advisable to give services realistic names that you can easily relate to and understand when tagged on to incidents.
- Choose an escalation policy that incidents occuring on this service shall be assigned to.
- (Optional) Set the number of minutes to wait before re-triggering an acknowledged incident on this service. It is good practice to set a reasonably short wait period here because in the event that a user acknowledges an incident and forgets to work on it in the midst of a critical response phase, alerts will be re-triggered to them shortly after to remind them. Re-triggering an alert cause the incident to switch back to "Open" state.
- (Optional) Choose a response set that you would like to trigger every time an incident occurs. This would be meaningful for services that are very critical and may need large scale responder and stakeholder mobilization. This feature is not available on all accounts. Check the subscriptions plan to see if your account is eligible for response sets.
- (Optional) Specify if you would like TaskCall to use its artifical intelligence tools to identify similarity between a triggered incident and other on-going incidents on the service and group them accordingly. TaskCall's intelligent grouping is a powerful noise reduction tool. It groups similar incidents in real time and avoids alerting your responders repeatedly about the same issue while they are working on it. This feature is only available for the Digital Operations subscription plan.
- (Optional) Set the support hours. Incidents can occur any time of the day, but if you may not have or need to have people on-call at all times and would prefer to have off-hour incidents handled differently, then you can choose specific days and times of support here. However, if this service requires attention 24x7 then you can unselect this option. Read our section below on configuring support hours.
- Click Create.
Now when you go back to the Services page you will see your new service listed there. You can click on the name of the service to go to the Service Details page and add the integrations you want on it. We highly recommend that you read our documentation on adding integration to services after this.
Configuring Support Hours
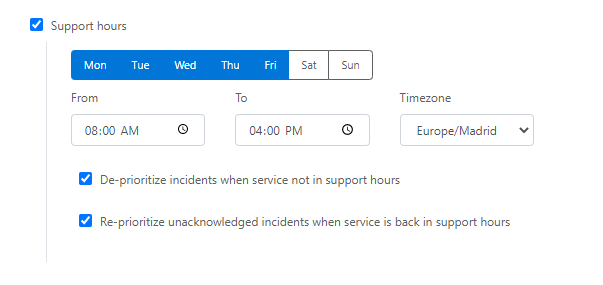
To configure the support hours:
- Choose the days of the week the service should be in support for.
- Set the time of the day the support starts from and the time it ends on.
- Select the timezone the support hours are in. Please ensure you select the correct timezone. Otherwise, you may noy get your desired outcome.
- (Optional) Select if you would like incidents triggered on the services in off-hours (when not in support) to be de-prioritized. When this option is set, the urgency of the incidents are amended to "Low" from their original urgency. Generally, notification rules are set based on urgency levels with the higher urgencies setting off the most rigorous alerting. So, by de-prioritizing you can avoid disturbing your responders in off-hours.
- (Optional) Select if you would like the incidents that were de-prioritized for having been triggered during off-hours (when not in support) to be re-prioritized when the service comes back in support the next time. This will allow those incidents to be brought back into the spotlight. When incidents are re-prioritized, their urgency is amened to "High" and the relevant notification rules are used to alert responders.
Enabling and Disabling Services
Services are set as enabled by default as they are created. Only services that are enabled can accept incidents being triggered on them. If a service is disabled, then the incidents occurring on them will not even show up as alerts. If you wish to disable a service, then:
- Go to the Services List.
- Click on the name of the name of the servce you want to disable. This will take you to the Service Details page.
- On the right hand side of the Service Details page you will see the option to "Disable Service". Once you click on it, the service will be disabled. You can see the current state of the service tagged next to the name of the service.
- If a service is already disabled, then you will be shown the "Enable Service" button instead of the disable button. Clicking on it will cause the service to be enabled again.
Edit Service Configurations
Only users with the right permissions will be allowed to edit. Read about account level and team permissions to create permission scopes for users.
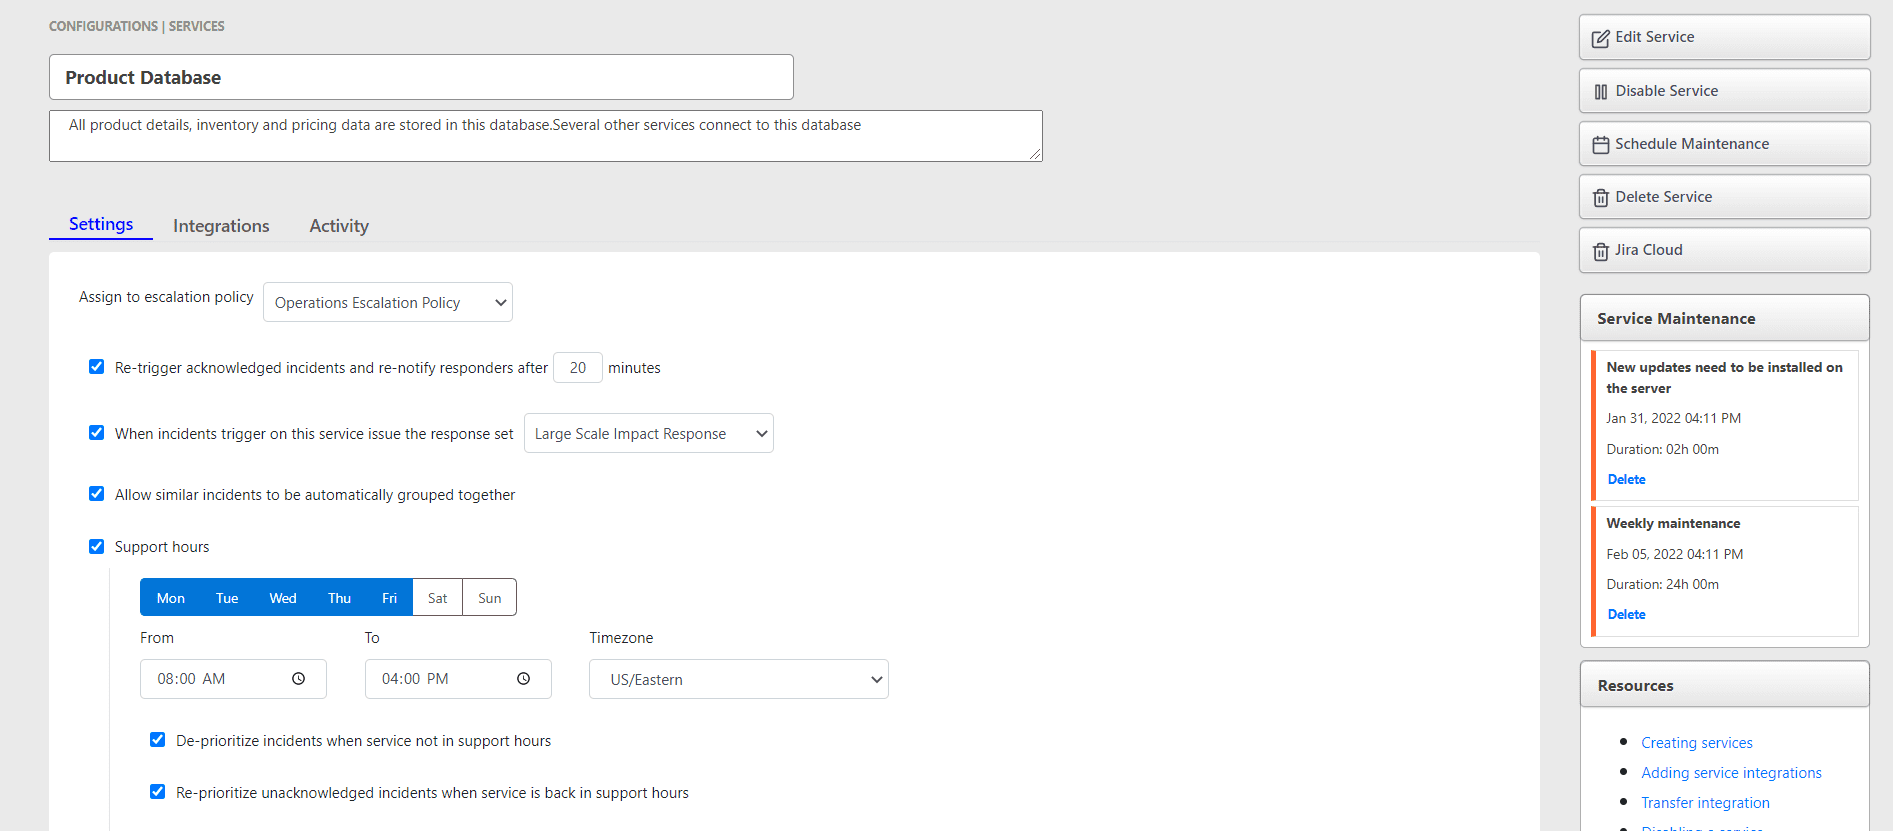
To edit a service:
- Go to Configurations > Services .
- Select the name of the service you want to edit. This will take you to the Service Details page.
- Enable the edit mode by clicking on the "Edit Service" button.
- Now you can edit the service configurations along with its name and description.
- Click Save once you are done.
Delete Service
If you want to halt a service for a certain period of time, then simply disable it without losing any of your settings. Once it is back up and running you can enable it again.
However, if you are sure you want to delete the service, then you do so with the "Delete Service" button on the right hand side of the Service Details page. Once a service is deleted it cannot be undone. Although historical data will not be affected, the current service configurations will be removed.
Add to Teams
Services can be added to teams to assign their ownership. Incidents triggered on the service will be tagged as belonging to the team that owns it. Compartmentalizing services through ownership allows teams to view and focus on incidents that are directly relevant to them. This feature is available only for accounts that have team permissions.
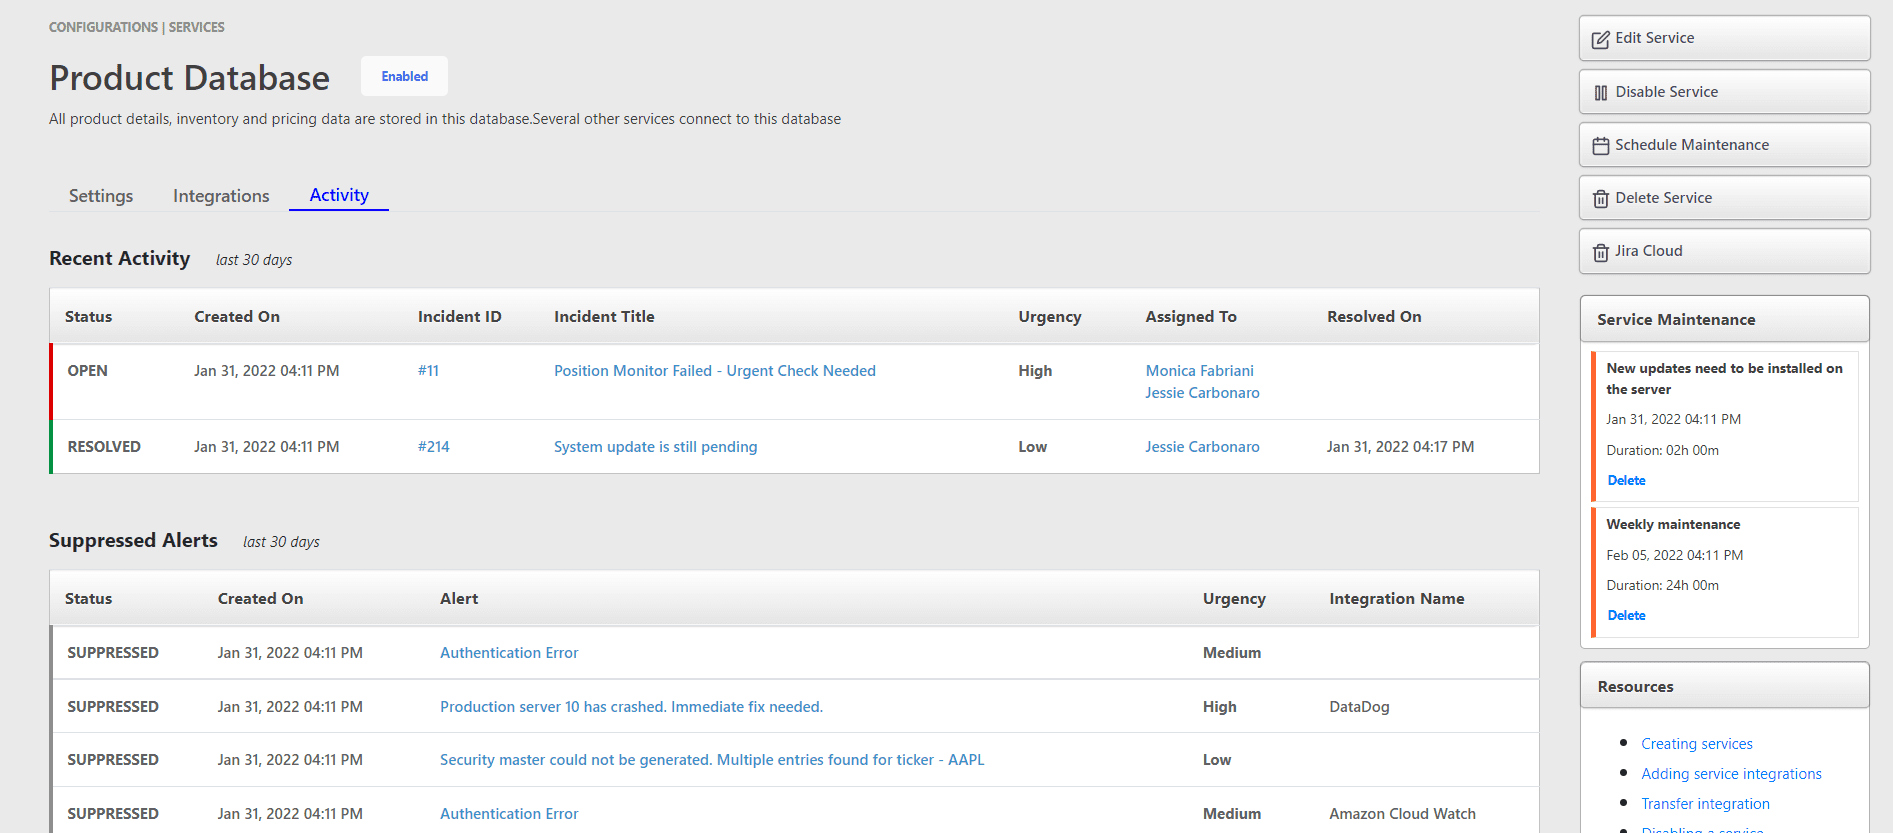
Activities
The "Activity" tab on the Service Details page gives a brief overview of the recent activity on the service. The actvity is split into two parts.
The first table shows the list of incidents that have been triggered on the service in the last 30 days. It will help you gather an idea of the types of incidents that have occurred on the service recently.
The second table shows the list of alerts that were received on the service, but were suppressed based on conditional routing rules or other configuratons of the service. It will help you understand how noise suppression is being applied to the service.