Custom Incident Actions
Trigger jobs and processes on external systems
Custom incident actions are actions defined by you outside the scope of built-in TaskCall actions. Custom actions are handled by an external system or service that can accept and process an incoming webhook. TaskCall sends a custom payload defined by you to the external webhook when the Custom Action is triggered.
Custom actions open up the platform to an unlimited number of actions. You can configure them to run any processes you like, whether it is in your own internal system with a publicly exposed webhook endpoint or a third party service. Some use cases include restarting a server, running diagnostics or updating status pages.
The actions are tied to a specific service and are only made available when an incident occurs on the service.
Pricing Plans
Custom Incident Actions are available for the Business and Digital Operations plans.
Pointers
- Custom incident actions comprise of a webhook endpoint where TaskCall can send data payloads.
- It can be both a HTTP or HTTPS endpoint.
- The default Content-Type is application/json.
Create Custom Incident Action
- Go to Configurations > Services . Select the service you want to set up the custom incident action on.
- Once you are on the Service details page, go to the Integrations tab. Click on New Integration.
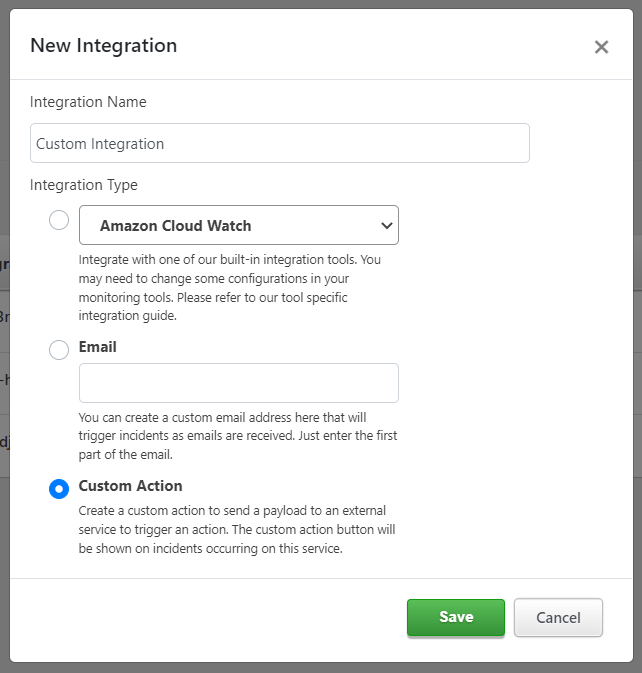
- Give the integration a name.
- From the integration types, select the Custom Action radio button.
- Click Save.
- A modal will be displayed.
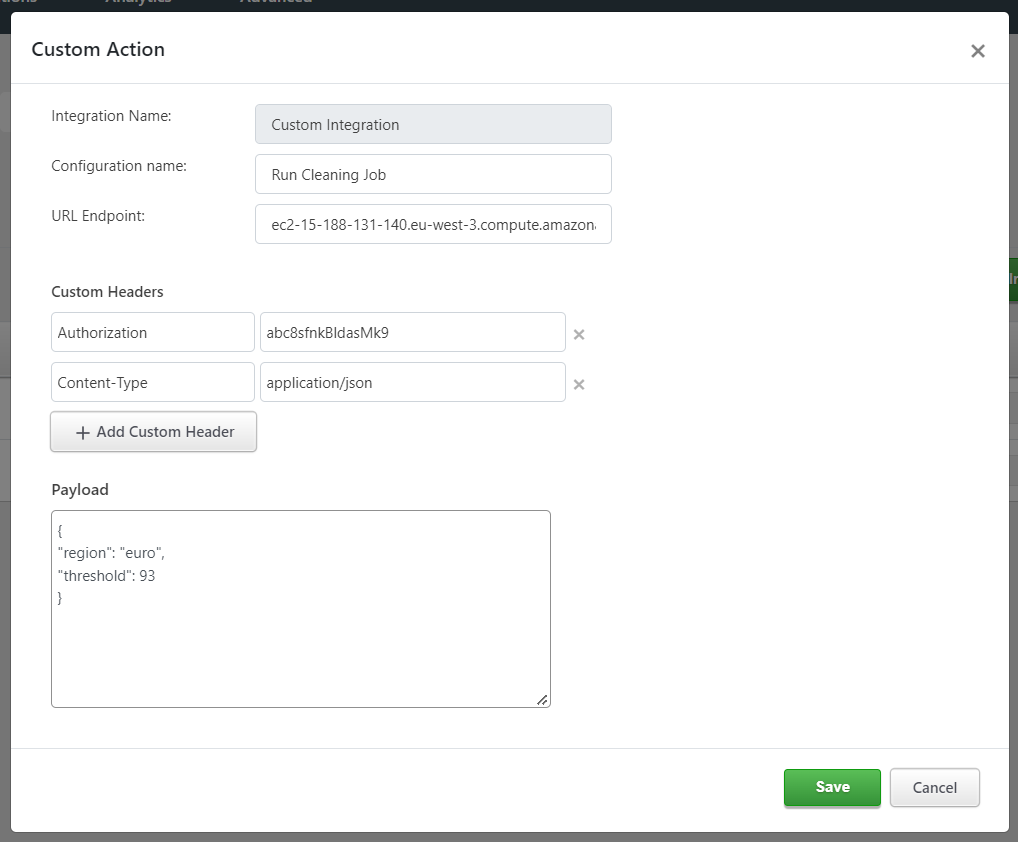
- Enter a configuration name (e.g. Restart Server). This is the name that will be shown on the custom button that will be displayed for you on the Incident details page if you choose to run the custom incident action process. This button will be displayed in the dropdown More in the incident actions button panel on the page.
- Enter the Webhook URL that the action will be triggered to in the URL Endpoint field.
- If you want, you can add custom headers. These will be sent along with the HTTP(S) request instead of the default headers. This is where you can add an Authorization Token to improve security and ensure that the payload sent is indeed coming from TaskCall. The verification, of course, has to be handled by the external service.
Custom header values are never shown again after the initial setup for security reasons. However, if you want to update them, then you can do so by reauthorizing the action. - Next, enter the data payload you would like to be sent with the request. Not all processes require additional data to be sent with the request, but if yours does, then please ensure that you enter it in valid JSON format. TaskCall does not run checks on this. So, you must do the JSON validation yourself.
- Click Save.
That's it! You have set up your Custom Incident Action. It will be available on the incident details page for incidents that occur on the integrated service.
Execute Custom Incident Action
Custom incident actions are made available on incidents that occur on the service that the action is configured on. On the top section of the incident details page where all the other actions are shown, click on the More button. Your custom action will be listed on the dropdown that opens up. It will be named the same as the Configuration Name it was set up with. Click on the action to execute it.