Services and Integrations
Services are real components of your system that are monitored by your internal tools or third party tools. Integrate with all your monitoring tools and enable bi-directional communication. When your monitoring tools detect an issue they will be automatically piped to TaskCall through the integration so we can help you start fastest response possible.
Integration Categories
- Built-in Integrations: TaskCall has built-in integrations available with third party tools that you may be using to streamline your on-boarding without having to make changes on your end. Some of these tools are for monitoring, some are for ticketing while some are chat-ops communication tools. TaskCall currently offers a limited number of built-in integrations. We are adding more every week. If you need a specific integration that we do not offer at the moment, please contact us and we will have it set up for your urgently.
- Email: Integrations through email are one-way communication channels that allow incidents to be triggered on your service by email. When an email integration is set up TaskCall reserves an address that you provide and associates it with the service. You should only provide the first part of the email address (the part prior to the '@' tag). If your provided address is "ops-fatal" and your organization's subdomain is "apollo", then the email addess reserved for the integration will be "ops-fatal@apollo.taskcallapp.com". Sending emails to this address will trigger incidents to the service.
Add Integration to a Service
When a service is first created, integration options are not shown. Integrations can be added once the service has been created. To add an integration:
- Go to Configurations > Services > Service Details.
- Select the "Integrations" tab.
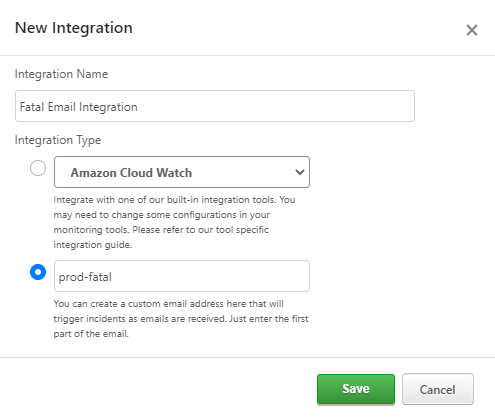
- Click the "Add Integration" button. A modal will open up.
- Give the integration a name.
- Chose between a built in integration or an email integration.
- If you choose the built-in integration then please select the type of integration.
- If you choose the email integration, then enter the first part of the address of the email you want to be minted for this integration. The addess here is only the first part of any email address prior to the '@' tag; not the whole email address.
- Click Save.
- If you chose an email integration then your requested email would be reserved by now and you should be able to see it in the lsit of integrations.
- If you chose a built-in integration then depending on the type of integration you may have to follow more steps to complete the integration. Please follow the guide respective to your integration.
Deleting an Integration
To delete an integration:
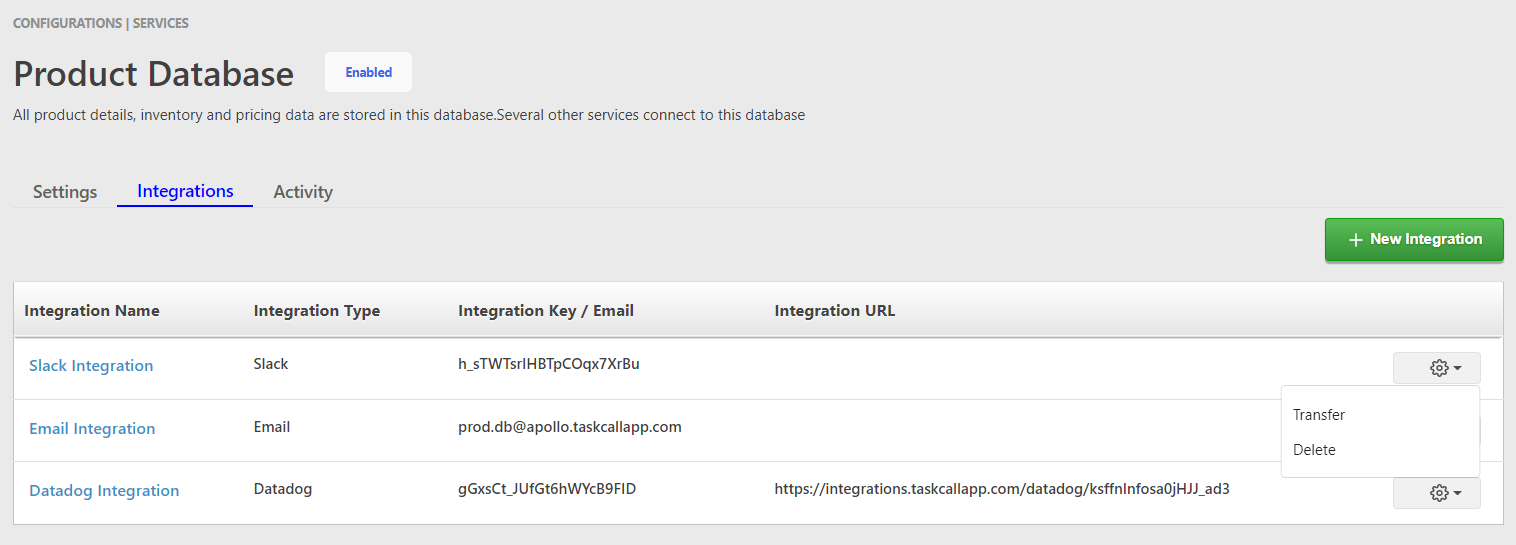
- Go to the "Integrations" tab on the Service Details page.
- From the list of integrations click on the gear icon on the right end of the integration you want to delete.
- From the options shown, click Delete.
- You will be asked for a confirmation. Once you confirm, the integration will be removed completely.
Transfer an Integration
An integration on one service can be transferred to another service if need be. To transfer an integration to another service:
- Go to the "Integrations" tab on the Service Details page.
- From the list of integrations click on the gear icon on the right end of the integration you want to transfer.
- From the options shown, click Transfer.
- Choose the integration you want to transfer the integration to.
- Click Transfer Integration.