Jira Cloud Integration Guide
Jira is a platform for agile work management and issue tracking. It is one of the most popular tools for collaboration amongst development teams.
Not all incidents can be resolved fully by an on-call responder soon after it occurs. Sometimes underlying incidents may require more comprehensive development with multiple team members working together. A quick patch may be implemented for the time being and the underlying required complete fix may be kept aside as a project based task. This is where TaskCall's Jira integration comes in.
TaskCall's Jira integration allows incidents to be tracked as bugs and issues in Jira. The issues can be created in Jira directly from TaskCall. It streamlines the development workflow and makes it easier for teams to collaborate. The status of Jira issues and comments made on it are synced with TaskCall giving teams more context to the issue and a much required head start when they start working on it.
Pointers
- The integration is between a TaskCall service and a Jira project.
- Issues can be manually or automatically created in Jira from TaskCall.
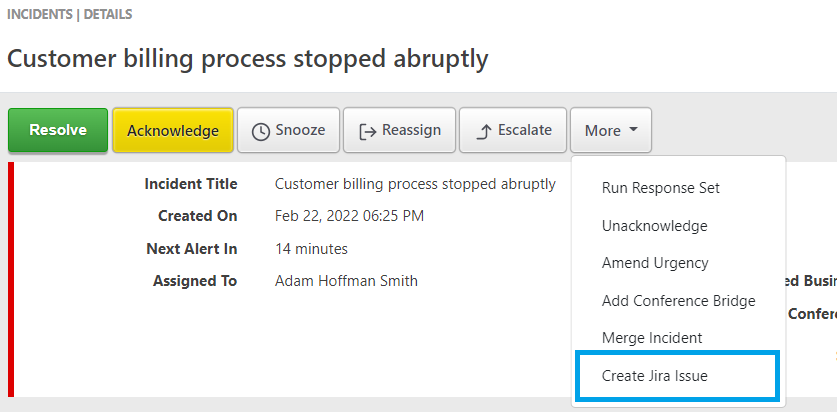
- If you choose to create the issues manually, then a custom button will be added to your Incident details page for that.
- Jira issue status, priority and comments are automatically synced up with TaskCall.
- The entire integration process is handled by TaskCall.
- All the integration steps will have to be performed at one go. Otherwise, you will have to start over again.
In TaskCall
- Go to Configurations > Services. Select the service you want to integrate with.
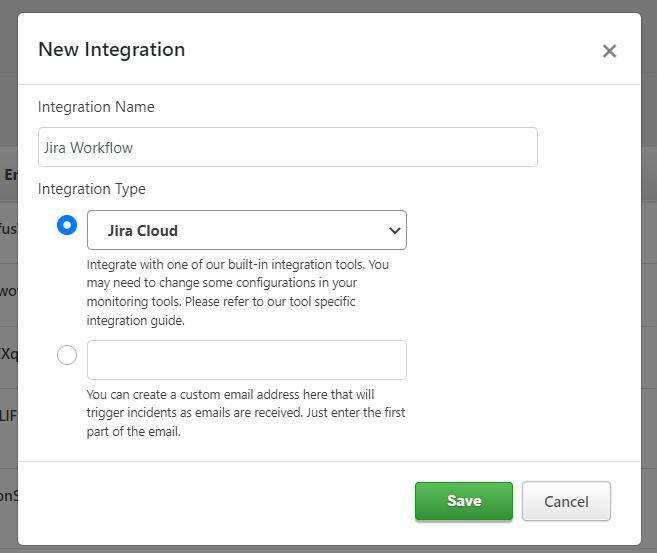
- Once you are on the Service details page, go to the Integrations tab. Click on New Integration.
- Give the integration a name.
- From the integration types, select the top radio button indicating that you are trying to use a built-in integration.
- From the list of built-in integrations, select Jira Cloud.
- Click Save.
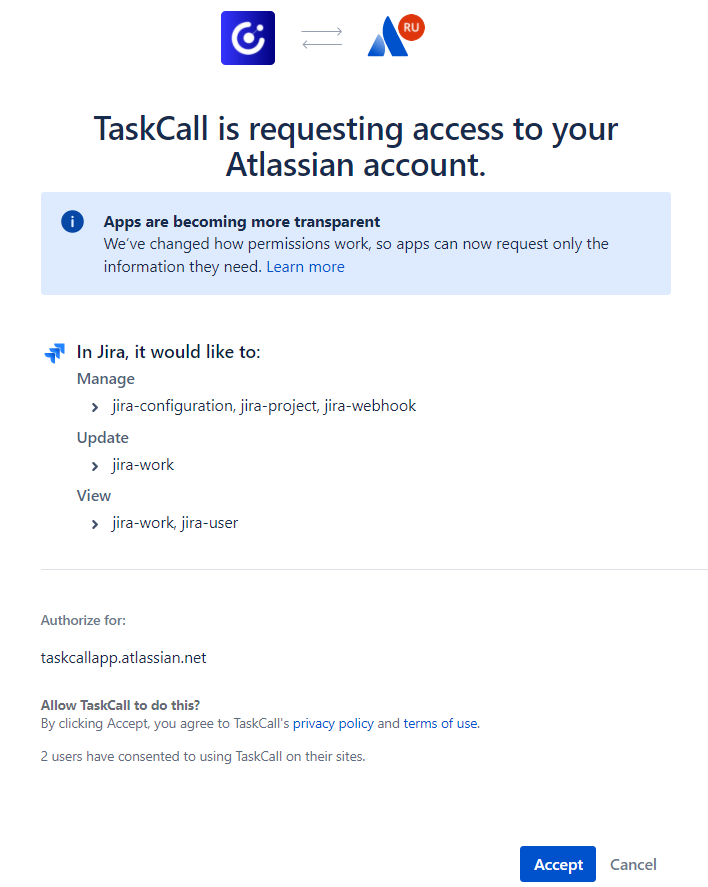
- You will be directed to the Jira authorization page. You will have to authorize TaskCall to have access to your Jira projects. (TaskCall does not store any of your user data. It only queries your Jira account for your projects and issues to be able to set up the integration.)
- Once you are on the authorization page, click Accept.
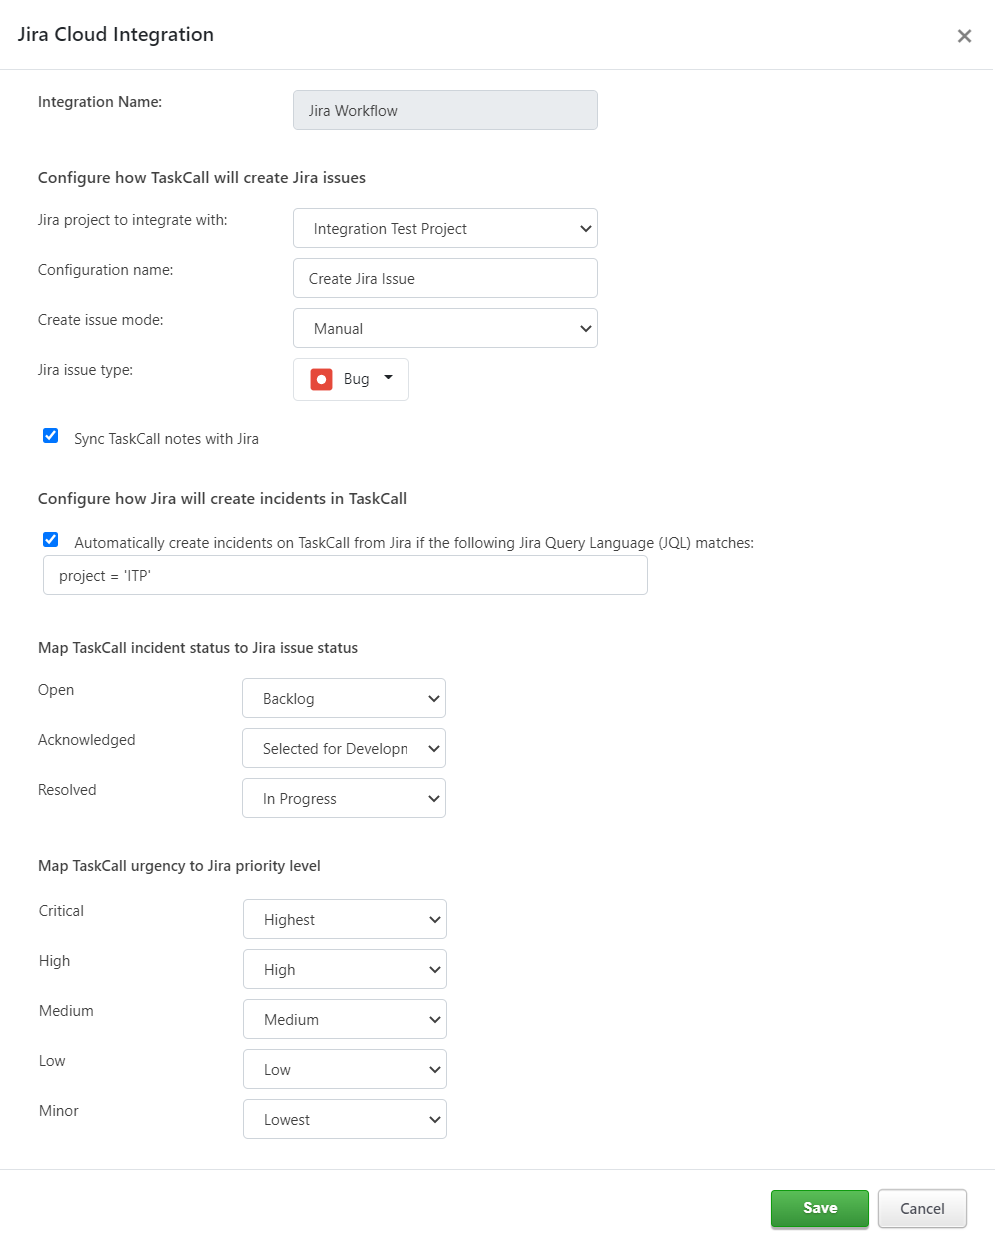
- You will be directed back to TaskCall. A modal will be displayed where you will be required to set up your integration configurations. Please note that the integration has not completed yet at this stage. Do not click out of the modal. Otherwise you will have to start all over again.
- Configure how issues will be created in Jira from TaskCall:
- Select the project that you want to integrate with.
- Give a configuration name (e.g. Create Jira Issue). This is the name that will be shown on the custom button that will be displayed for you on the Incident details page if you choose to create the issues manually. This button will be displayed in the dropdown More in the incident actions button panel on the page.
- Select whether you want to create the Jira issues manually or automatically. If you choose to create it manually, then you will be able to do so from the custom button that will be displayed for you on the Incident details page as mentioned above. The button will only be displayed for incidents that are triggered on the integrated service.
If you choose to create the issues automatically, then whenever an incident occurs on this service an issue will be created in Jira as per the configurations. - Choose the type of issue that will be created in Jira by this integration.
- Next, tick the checkbox if you want TaskCall notes to be synced with Jira comments. (Notes added to the incident will appear on the Jira project. However, comments made on the Jira project are not added as notes in TaskCall.)
- Configure how incidents will be created in TaskCall from Jira issues:
- TaskCall incidents can be automatically triggered whenever a Jira issue is created. To configure that check the box that says Automatically create incidents on TaskCall from Jira if the following Jira Query Language (JQL) matches and enter a valid JQL in the text box below it. JQL is a Jira specific query language that will allow you to filter down to the category of issues that you want to create incidents on.
- Map statuses and priorities between TaskCall and Jira so they can be synced up (only changes made in TaskCall are reflected in Jira, but Jira changes are not reflected in TaskCall):
- Set up how Jira statuses will be mapped to TaskCall.
- Set up how Jira priorities will be mapped to TaskCall urgency levels.
- When you are done, click Save.
- That's it. You are all set up to mobilize your development workflow even more.
Make all Jira fields optional
At the moment TaskCall only sends the "summary" and "description" fields to create a Jira issue. If you have any other fields marked as required, then a Jira issue will not be created and you may see an error. In order to avoid such errors, please make all fields in your Jira project optional. These changes can be made from Project Settings > Summary > Fields.
How to manually create Jira issue?
When you configure the integration to create Jira issues manually, TaskCall displays a custom button for you on the incident details page of incidents that occur on the integrated service. The button is shown in the dropdown options of the More button towards the top of the page. By clicking this button, you will be able to create an issue in Jira.
Where to find the synced issue?
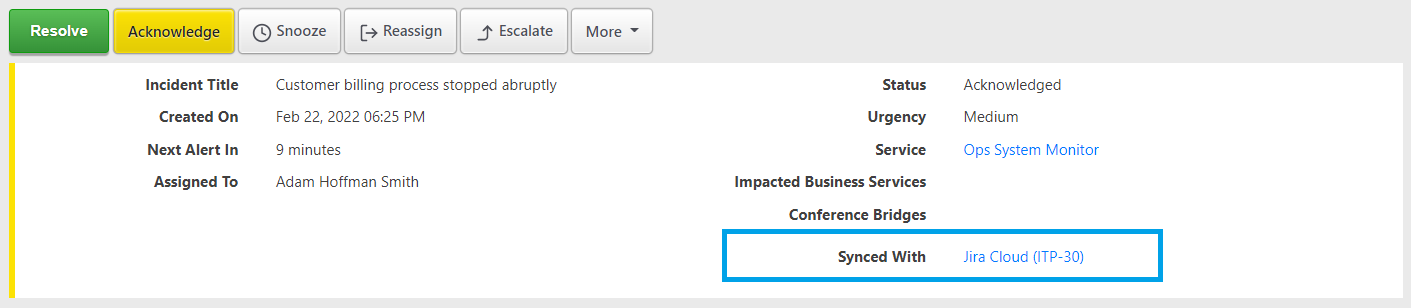
Once a TaskCall incident is synced with a Jira issue, the issue key is displayed on the upper panel on the incident details page next to the Synced with label.
Use Jira Webhooks Directly
TaskCall takes care of the incoming webhooks from Jira Cloud for you. It creates the webhooks through Jira REST API. However, due to differences in implementations, webhooks created through the REST API lack certain filtering options. In such cases, you can choose to create your own webhooks in Jira and set a TaskCall endpoint. To do so, please follow the below steps:
- When you set up the integration, do not choose the option to automatically create TaskCall incidents from Jira issues. Instead, after you complete the integration, go to the Integrations tab and scroll down to where the integration details are listed. You will see an Integration URL has been generated for your Jira Cloud integration. Copy the URL.
- Now go to your Jira Cloud account.
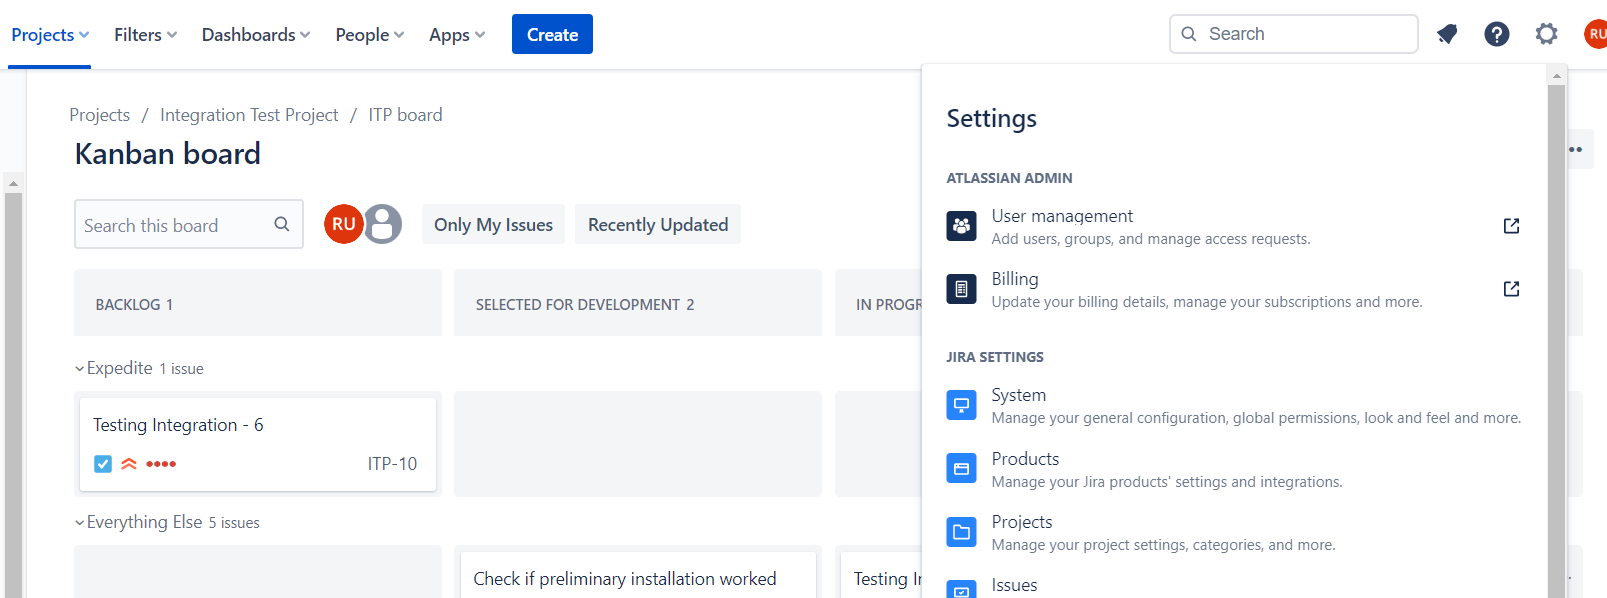
- Go to Settings > System. The settings icon is on the top right corner of your dashboard.
- You will be taken to your Admin area. On the left hand side panel, scroll down to the Advanced section and select WebHooks.
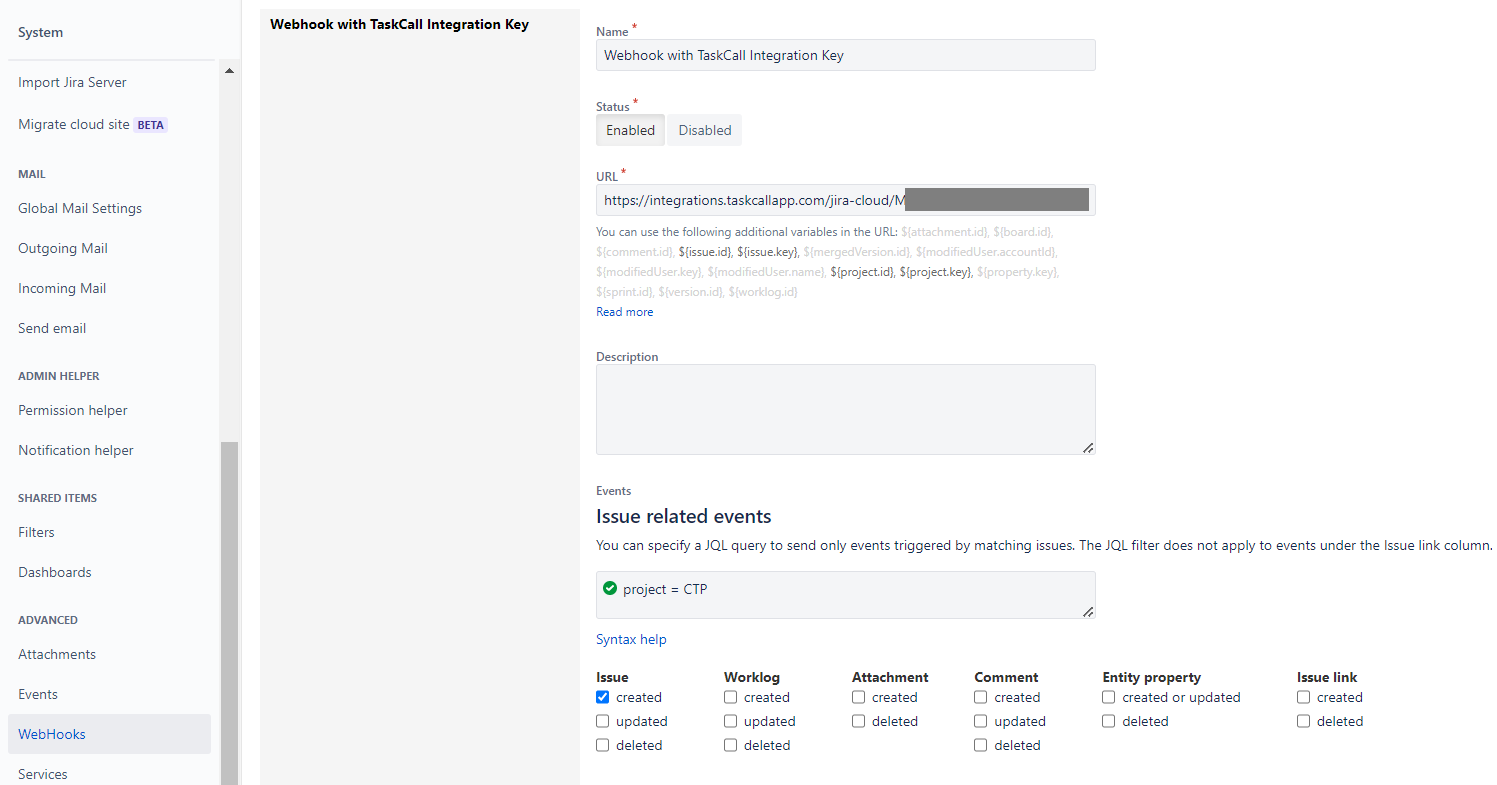
- Click Create a Webhook.
- In the form that is shown, paste the Integration URL you copied over from TaskCall in the URL field. Enter the JQL you need. In the Issue related events section, select the issue created option. Make sure to not select other options as they may result in an unwanted loop of incident creation.
- Save when you are done and test out the integration.