Adding and Removing Users
Adding your colleagues to your organization's TaskCall account is seamless. All you need is their email address. Email invites are sent to each potential user and they will be able to register themselves on to the platform. The request will only last for 3 days within which the invitee must register their account. Otherwise, the invite has to be resent.
Users can only be added, edited and removed by the Admins and the Owner.
Add Users
To add a user:
- Go to Configurations > Users.
- Click the Request New User button on the top right hand corner.
- Enter the email address of the invitee and select the account role the user will have. You can also optionally enter the user's official title/position.
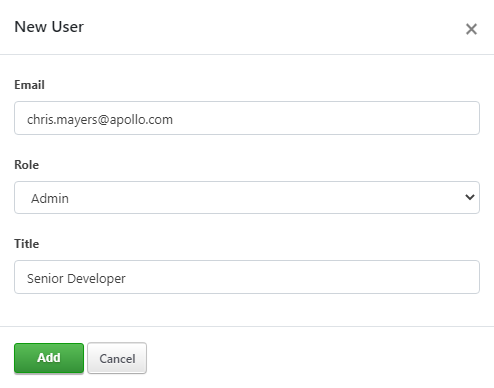
- Click Add.
- Done! An email will be sent to the email address with registration instructions.
Resend Invite
In the event that the email invitee did not register themselves before the invite expired, the invite can be resent with a single click.
- On the Configurations > Users page, go to the Requested Users tab. Email invites that are sent out for which no corresponding accounts have been registered yet are listed here.
- Hover over to the email item that you would like to resend the invite to and click the paper plane icon on the right side (next to the delete icon) button.
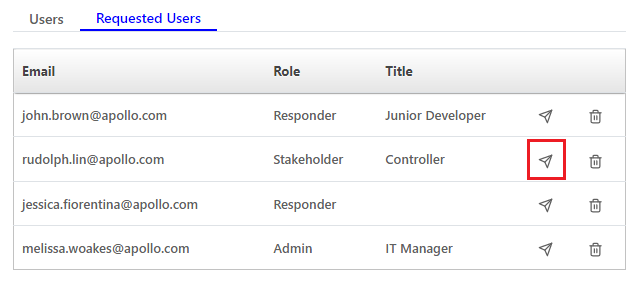
- That's it! The invite will be resent giving the invitee another 3 days to register by.
Edit Role
User roles may need to be edited sometimes to better control access permissions. User roles can only be edited by Admins and Owner only.
- Go to Configurations > Users. Stay on the Users tab that lists all the current users.
- From the dropdown options on the right side of the line item of the user whose role you want to edit, select Edit.
- Select the new role that should be assigned to the user. Click Update.
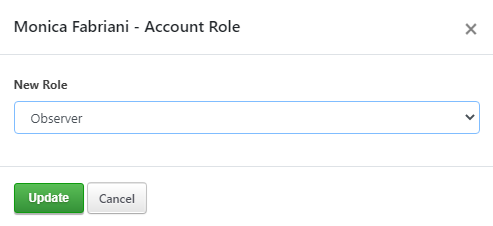
- The user's role would be updated immediately. However, the user must log out and log back in for the changes to be reflected.
Transfer Account Ownership
An account must always have an owner. As a result, the owner cannot be removed from the account directly. The owner must first transfer the ownership of the account to another user before his account can be removed. The ownership can only be transferred by the Owner himself.
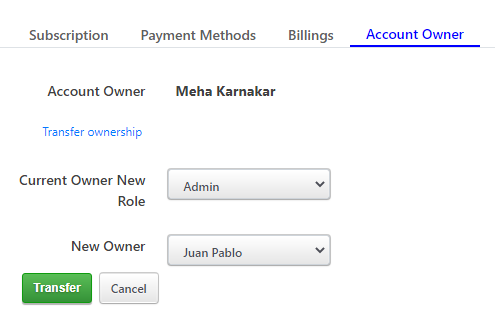
- Go to Configurations > Organization.
- Scroll down to the middle and go to the Account Owner tab.
- Click the Transfer ownership button.
- Choose the new role of the current owner and select the user who the ownership will be transferred to.
- Click Transfer.
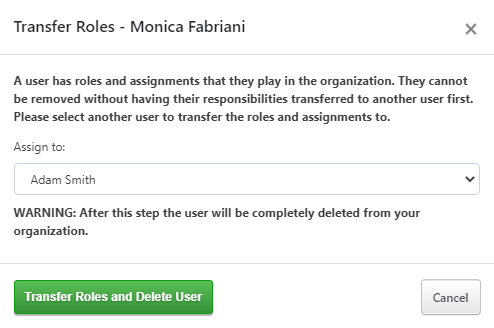
Remove Users
Users cannot be directly deleted. Their responsibilities must first be transferred to another user.
- Go to Configurations > Users. Stay on the Users tab that lists all the current users.
- From the dropdown on the right side of the line item of the user who you want to remove, select Delete.
- You will be prompted to confirm that you want to delete the user. Click Yes.
- Another prompt will be shown. Select the user to who you want to transfer the role of this user to.
- Click Transfer Roles and Delete User.
Unlock User
User accounts can get locked due to various reasons including failed login attempts to protect the user from any unwanted activity. In most of these situations, admins of the organization can directly unlock their account. Users whose accounts are locked will be highlighted with a lock icon on the users list.
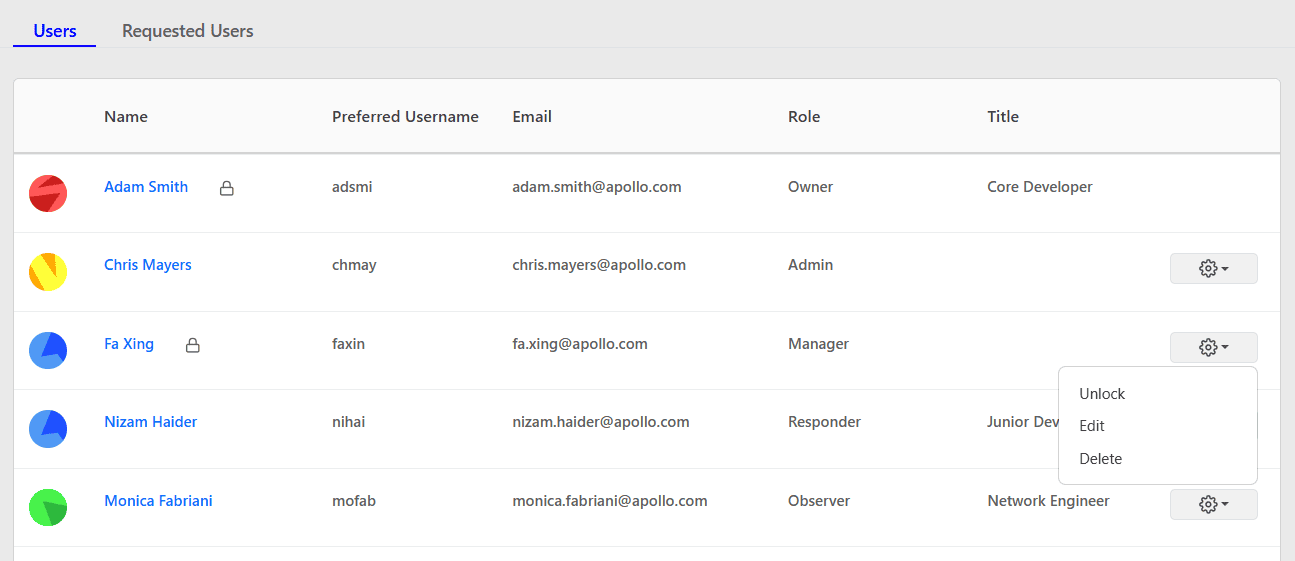
- Go to Configurations > Users. Stay on the Users tab that lists all the current users.
- From the dropdown on the right side of the line item of the user who you want to unlock, select Unlock.
- You will be prompted to confirm that you want to unlock the user. Click Yes.
In the event you are still unable to unlock a user directly, please contact support@taskcallapp.com.