Rundeck Integration Guide
Rundeck is a job scheduler and runbook automation system for automating processes across your infrastructure. It allows routine processes to be systematically run over and over again readily. It helps companies orchestrate continuous deployment by automating complicated release pipelines.
TaskCall integrates with Rundeck to allow incident responders to run diagnostics and system jobs on impacted components from within TaskCall with a click of a button eliminating the need for additional responders to be brought on to handle infrastructure deployments. This reduces incident duration and the number of escalations. Your team can now do more in less time.
Pricing Plans
Rundeck integration is available for the Business and Digital Operations plans.
Pointers
- The integration is between a TaskCall service and Rundeck.
- Rundeck diagnostics and jobs can be run both manually and automatically from TaskCall.
- If you choose to run the process manually, then a custom button will be added to your Incident details page for that.
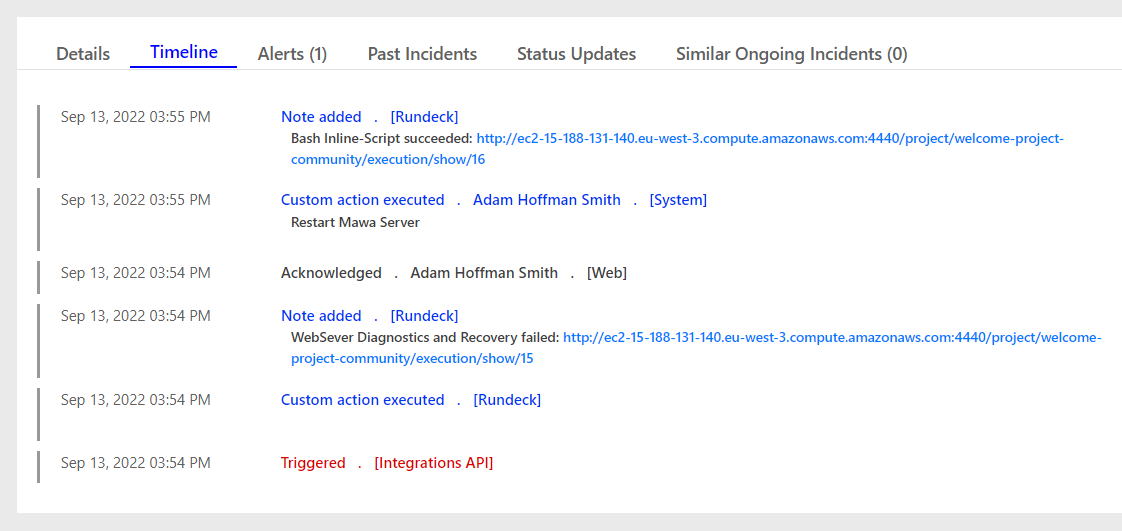
- When a Rundeck process is run, its activity and status can be followed from the incident timeline and notes.
- Incidents that are created from Rundeck webhooks (outgoing from Rundeck) will be automatically resolved when the process that triggered the webhook succeeds.
- The integration requires you to have the right permission in both Rundeck and TaskCall.
- Setting up the integration requires you to switch between Rundeck and TaskCall twice. Both incoming and outgoing webhooks need to be created on Rundeck. Please follow the entire guideline.
Rundeck Incoming Webhook Setup
- At first we will need to create an incoming webhook endpoint in Rundeck. This will allow TaskCall to trigger diagnostics and jobs on Rundeck.
- Open up your Rundeck portal.
- Go to Webhooks. Click Create Webhook.
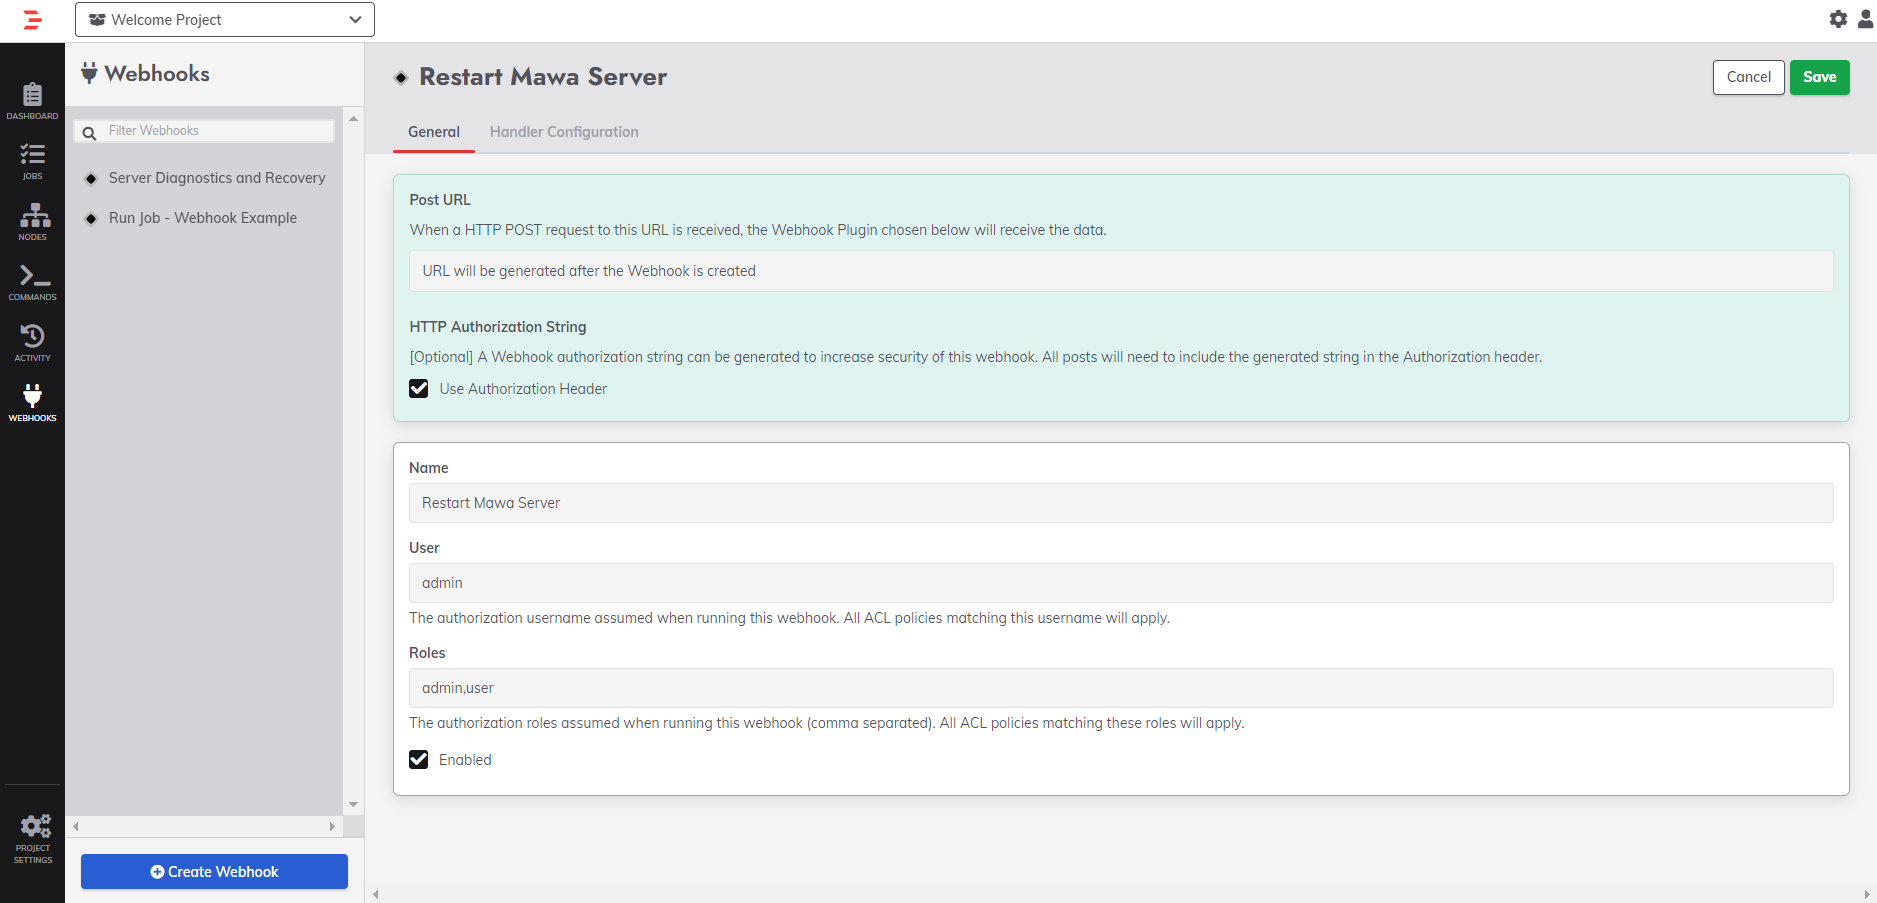
- Check the Use Authorization Header checkbox at the top of the page. Once this is checked, Rundeck will create an authorization token along with the webhook. TaskCall requires a Rundeck generated authorization token to be provided to it.It will be sent with every webhook request so that Rundeck can confirm the source making the process more secure.
- Then give the webhook a name, assign the user and role that would be assumed when running the webhook. Check the Enabled checkbox.
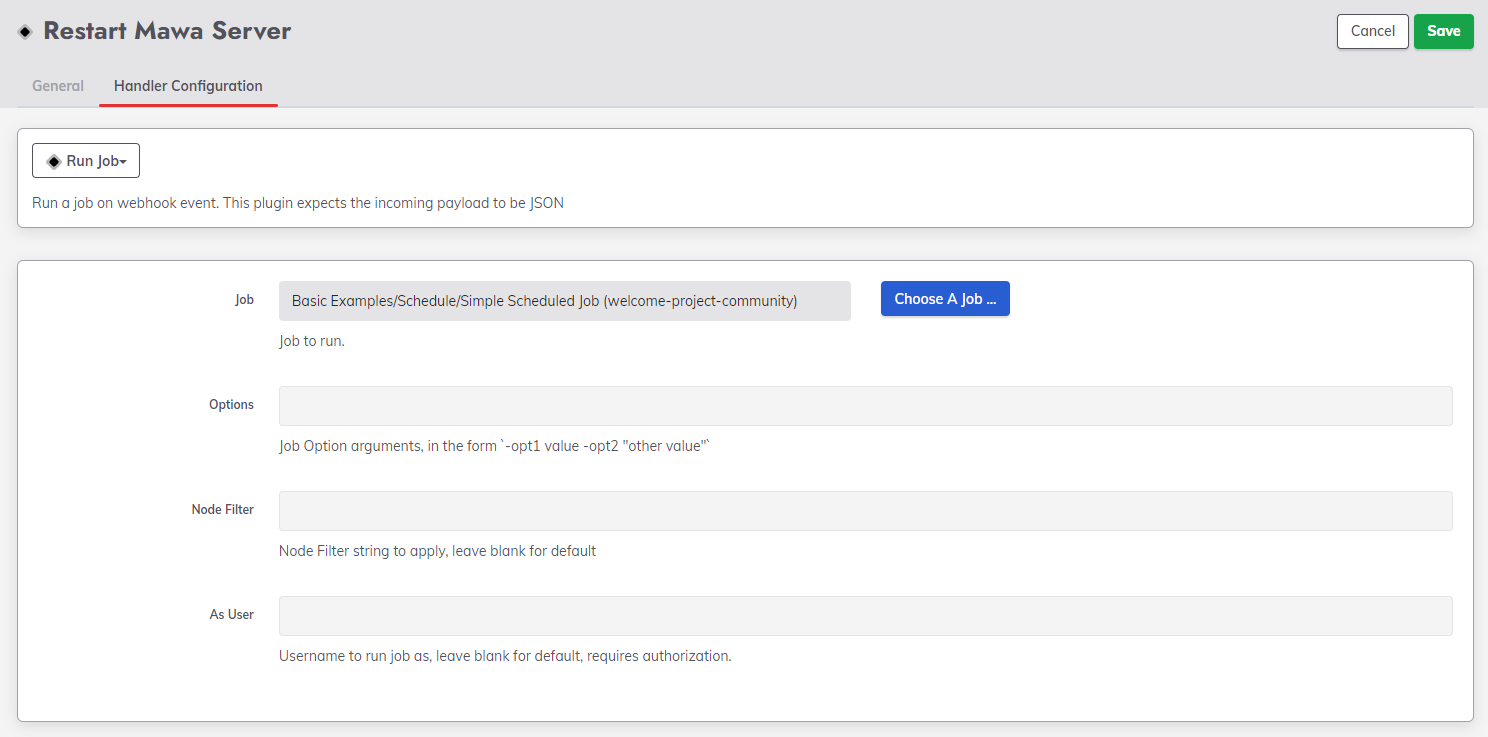
- Go to the Handler Configuration tab and select the job you want to run for this integration. Set up any other parameters you want to be processed here.
- Click Save.
- A Webhook URL will be generated along with an Authorization String. Copy the Webhook URL and the Authorization String and store them somewhere. We will need them in the next steps.
- Now go to your TaskCall account.
- Go to Configurations > Services . Select the service you want to integrate with.
- Once you are on the Service details page, go to the Integrations tab. Click on New Integration.
- Give the integration a name.
- From the integration types, select the top radio button indicating that you are trying to use a built-in integration.
- From the list of built-in integrations, select Rundeck.
- Click Save.
- A modal will be displayed.
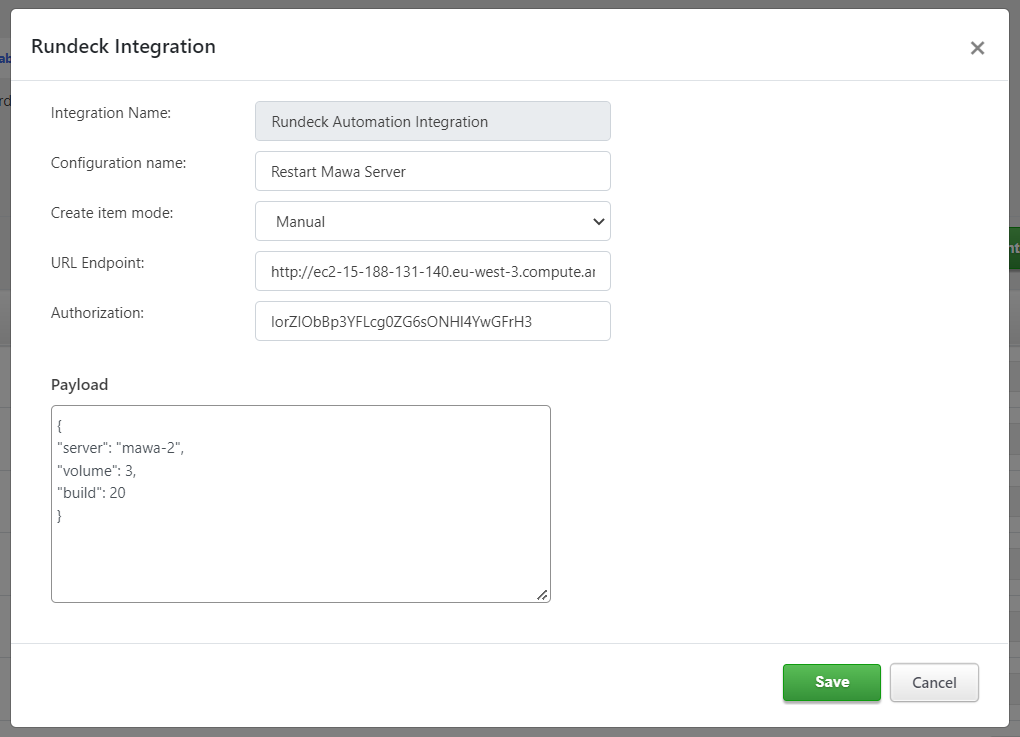
- Enter a configuration name (e.g. Restart Server). This is the name that will be shown on the custom button that will be displayed for you on the Incident details page if you choose to run the Rundeck process manually. This button will be displayed in the dropdown More in the incident actions button panel on the page.
- Select whether you want to run the Rundeck process manually or automatically. If you choose to create it manually, then you will be able to do so from the custom button that will be displayed for you on the Incident details page as mentioned above. The button will only be displayed for incidents that are triggered on the integrated service.
If you choose to run the process automatically, then whenever an incident occurs on this service it will be run as per the configurations. - Paste the Webhook URL you copied over from Rundeck into the URL Endpoint field.
- Paste the Authorization String you copied over from Rundeck into the Authorization field. The Authorization String will never be shown to you again after this.
- Next is the payload field. Not all jobs will need to send a payload, but if you had set up Options in the Handler Configuration in Rundeck, then you may need to provide the payload data you will want TaskCall to send with the webhook. The webhook accepts JSON data only. You must ensure that the payload is formatted correctly. TaskCall does not run checks on this.
- Click Save.
- We have now created the Rundeck integration in TaskCall.
At this stage we have completed the incoming webhook setup on Rundeck. TaskCall will be able to send instructions to Rundeck to run jobs with this set up. However, we still need to setup status notifications to be sent to TaskCall from Rundeck so you can know whether the jobs run have succeeded or not.
Set Up Rundeck Notifications
Rundeck notifications allow data to be sent from Rundeck to TaskCall. Diagnostics and job updates can be processed by TaskCall and displayed so responders can know the status of the processes they are running. It creates a bi-directional flow of information enabling you to take control of impacted systems from within TaskCall.
Notifications can also be set up to create incidents on TaskCall. This will allow you to address failed processes faster.
In order to set up the notifications, you need to have a Rundeck integration created in TaskCall following the steps above.
- Go to the integrations tab on the service you created the Rundeck integration. From the integrations listed, find your Rundeck integration.
- Copy the Integration Url. This is the endpoint where TaskCall will receive the notifications.
- Now go to your Rundeck account.
- Go to Jobs. Select the job to you want to configure the notifications on.
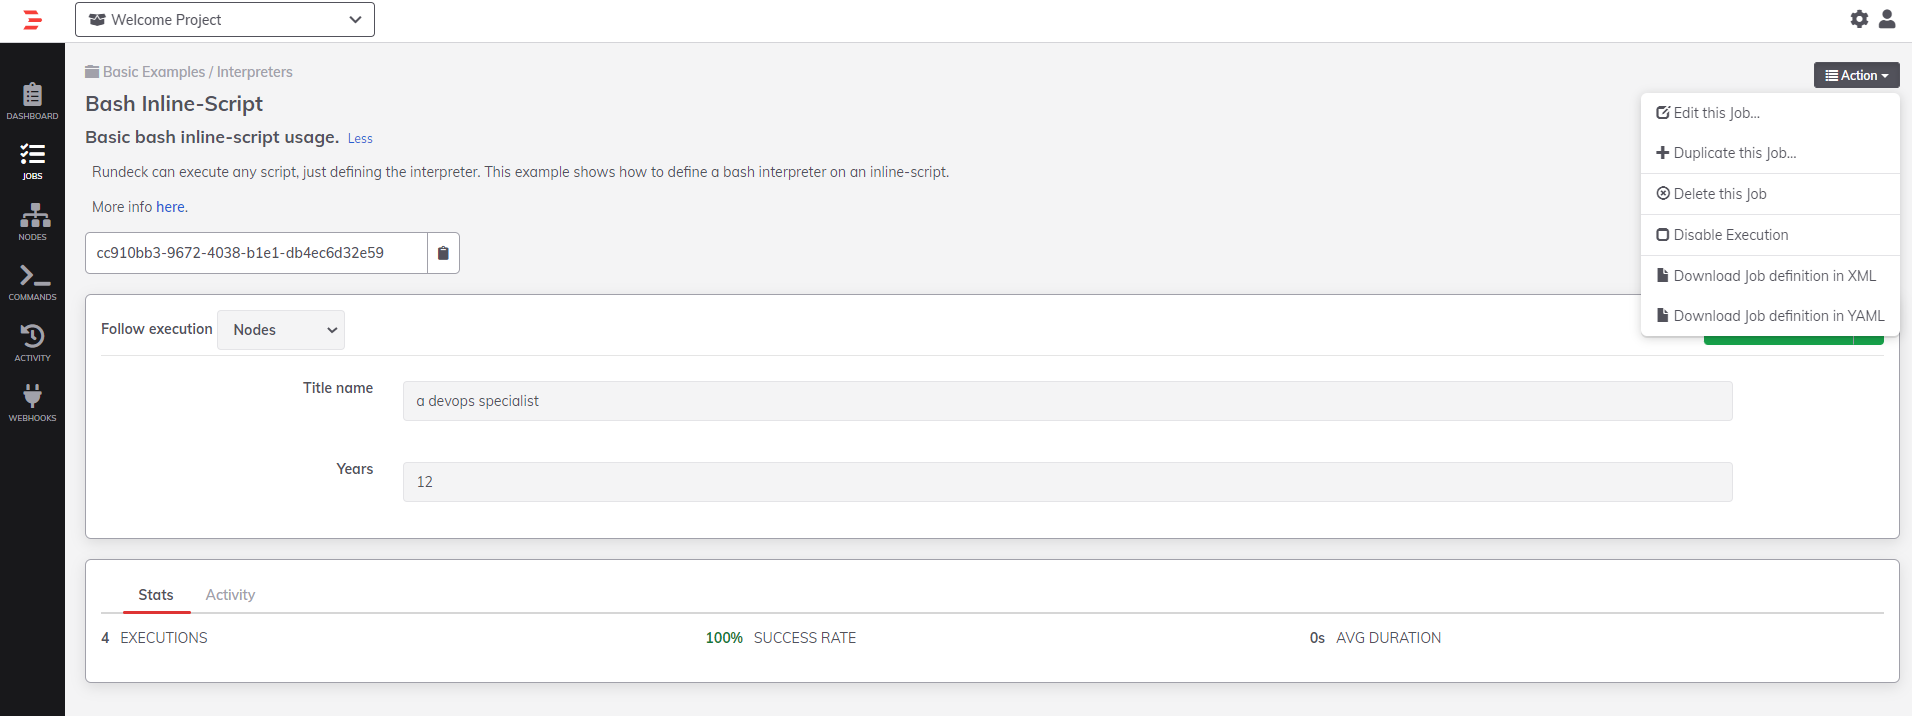
- On the job description page, click on the Actions button on the top right corner and then select the option Edit this job.
- Go to the Notifications tab. You will see all the types of triggers notifications can be set on listed there. We will recommend that you set up notifications for On Start, On Success and On Failure. You will have to configure notifications for each of the triggers separately.
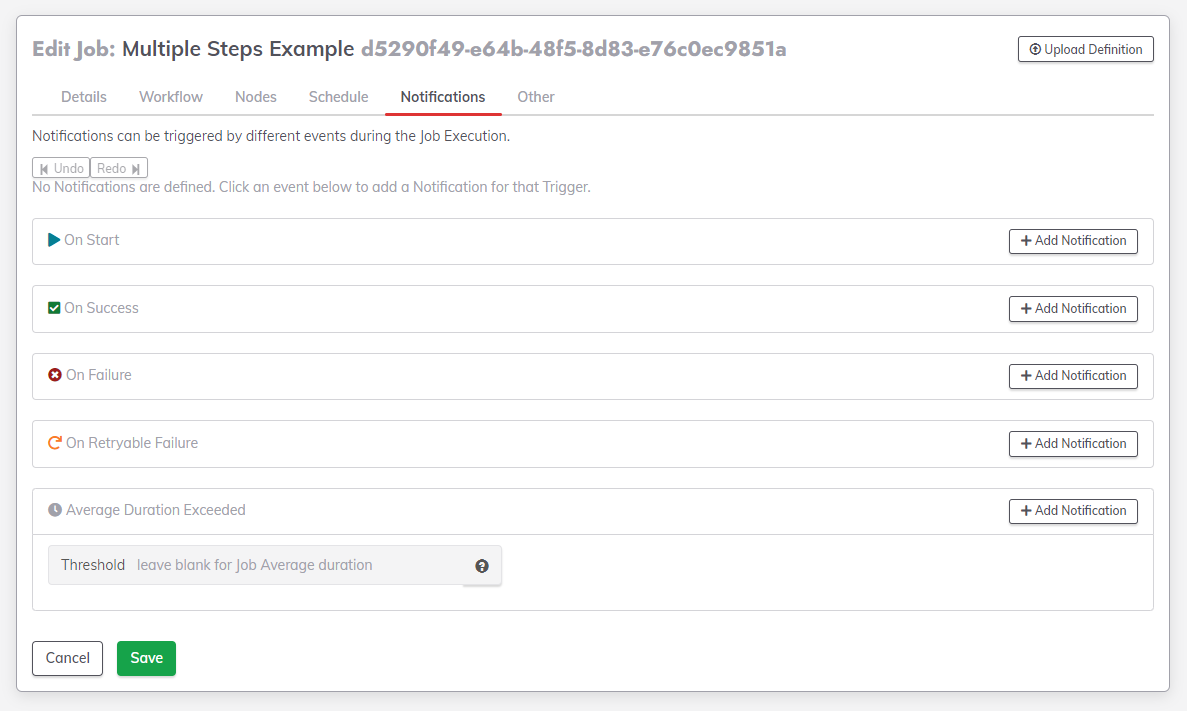
- Click Add Notification next to your desired trigger type.
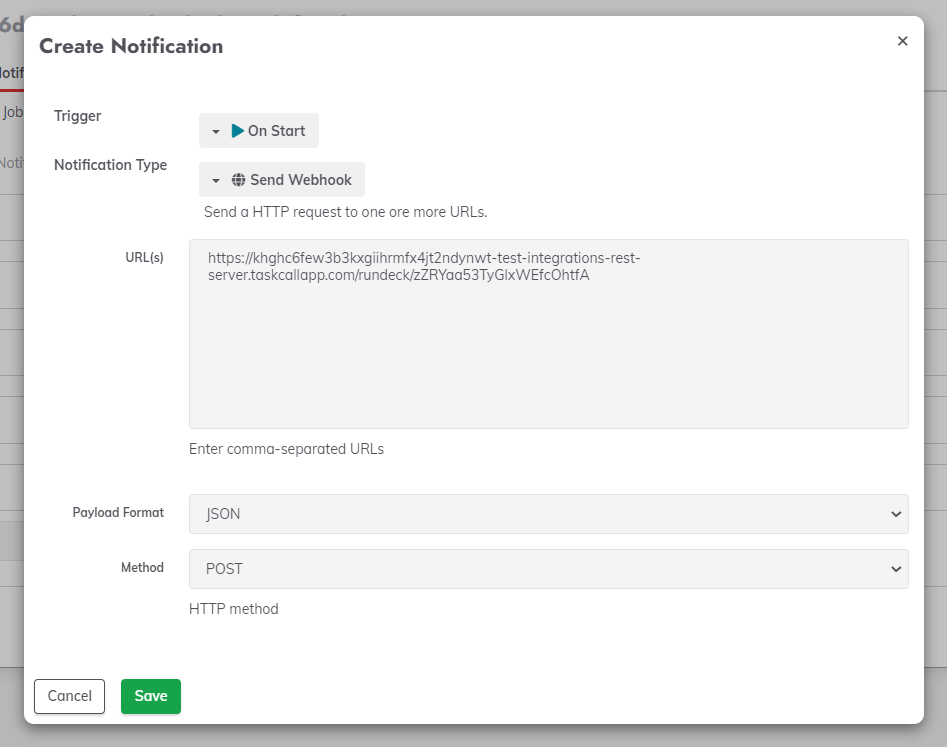
- On the modal that is shown, select the Webhook Notification Type. Paste the Integration Url you copied over from TaskCall in the URL(s) field. Set the Payload Format to JSON (this is very important) and set the Method to POST.
- Click Save.
- Repeat the process for the other trigger types that you want to be notified about.
Done! You have fully integrated Rundeck with TaskCall. You can now run automated processes from TaskCall and get their status updates as well. Continue reading to understand how TaskCall processes Rundeck notifications and where they are logged.
Creating Incident from Rundeck Notifications
When a Rundeck process is run from TaskCall, the best way to keep track of them is through the notifications generated by Rundeck. TaskCall keeps track of the diagnostic or job that is executed by the process and identifies incoming notifications from that process as its activity log. These are then added to the incident that the process was run from.
However, when a notification is received from Rundeck whose execution was not initiated by TaskCall, a new incident is created from it. The incident will be labelled as having been synced up with Rundeck. The execution ID of the process will be shown under the Synced with field on the incident details page. When the process that triggered the incident succeeds, the incident will be automatically resolved (if the On Success trigger is set up).
Notifications that correspond to failed processes have a Critical urgency level while the rest are marked with a High urgency.
Rundeck Activity Logs
When process execution updates are received by TaskCall through Rundeck notifications they are added as notes to the incident. These notes can be seen from both the Notes panel and the Timeline panel on the incident details page. When you run a process check the Timeline to see when and whether it succeeds.
