
Zabbix Integration Guide
Zabbix is an enterprise level open source monitoring software for a wide range of IT components. It allows you to monitor your network, all your server, virtual boxes and your cloud infrastructure. It provides monitoring metrics along with system utilization and performance insights.
With TaskCall's Zabbix integration transport metric alerts from Zabbix to your on-call responders and get them to address the incidents in real time. Increase the capabilities of Zabbix with TaskCall and reduce your system downtime.
Pointers
- The integration happens between a TaskCall service and Zabbix.
- This integration works for Zabbix 5.0 and above.
- Incidents will automatically resolve in TaskCall when metrics fall back within the normal threshold.
- Incidents can be acknowledged and their urgency can be updated from Zabbix to TaskCall.
- At the moment, alerts and actions can only be received from Zabbix to TaskCall.
In TaskCall
- Go to Configurations > Services . Select the service you want to integrate with.
- Once you are on the Service details page, go to the Integrations tab. Click on New Integration.
- Give the integration a name.
- From the integration types, select the top radio button indicating that you are trying to use a built-in integration.
- From the list of built-in integrations, select Zabbix.
- Click Save.
- Copy the Integration Key that is issued for the integration.
In Zabbix
There are several steps that needs to be completed to set up the integration in Zabbix before alerts cab be triggered on TaskCall. Firstly, a new Global Macro has to be created if it has not been already. Then a new Media Type has to be created for TaskCall. Lastly a new user has to be created who the newly created media type has to be associated to. This user can then be assigned to Actions that will trigger alerts to TaskCall.
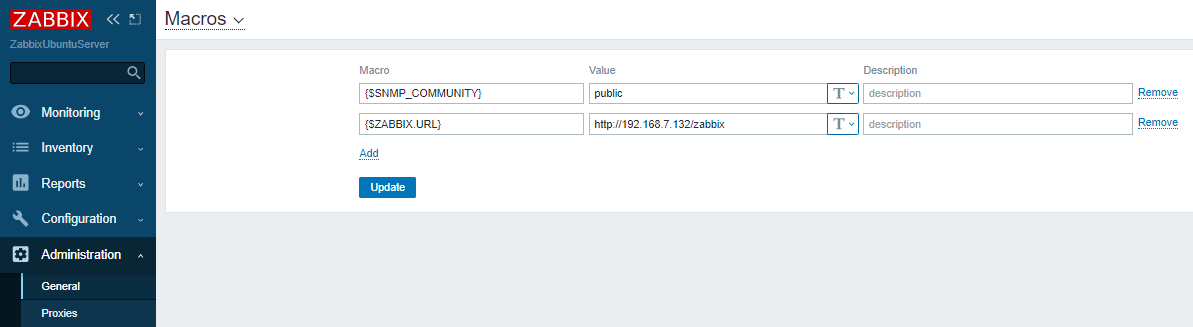
- First, you need to create a new Global Macro.
- Go to Administration > General . From the dropdown list select Macros. Click Add.
- In the Macro field enter {$ZABBIX.URL} and enter your frontend URL for Zabbix as the value. Click Update.
- Now, you need to create a new media type for TaskCall.
- "Media type" in Zabbix allows you to define a channel of communication with its own script. We already have media file for Zabbix prepared. You will simply need to download it and then import it into Zabbix.
- Go to TaskCall Zabbbix Integration repo on github and download the latest release of the TaskCall Zabbix media file. If your account is hosted in the EU region you must download the taskcall_zabbix_media.xml file. If your account is hosted in the US region, you must download the taskcall_zabbix_media_us.xml file.
- Then go to Administration > Media types. Click Import.
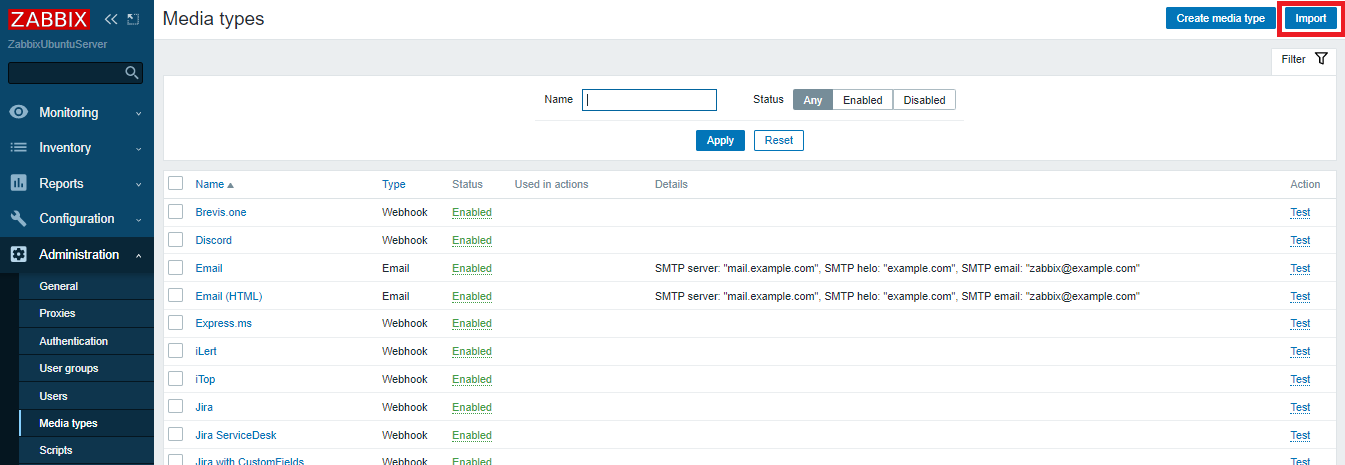
- Upload the taskcall-zabbix-media.xml file you downloaded. Click Import.
- Once the file is imported successfully, go back to the Media types page. You should see TaskCall appear as a media type. Click on it.
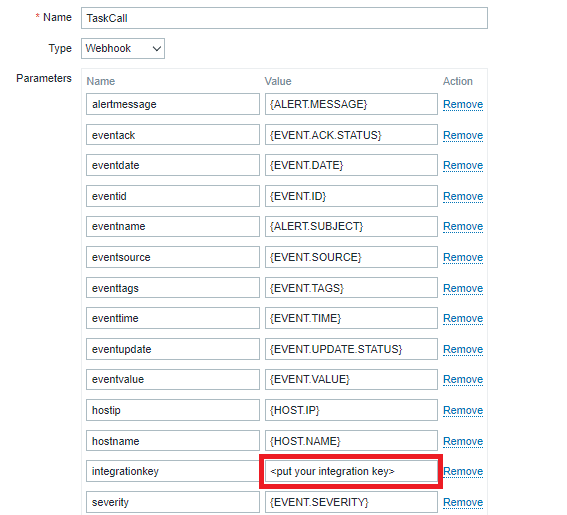
- Find the integrationkey parameter and replace its value with the Integration Key you copied over from TaskCall. Then click Update.
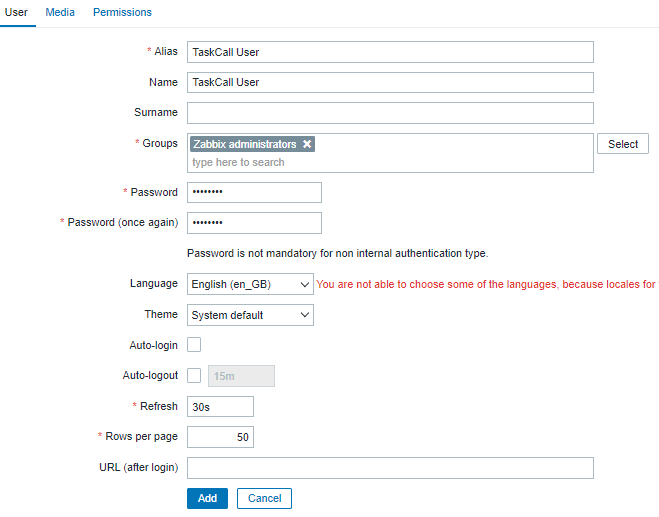
- Now we are going to create a TaskCall user who actions can be assigned to.
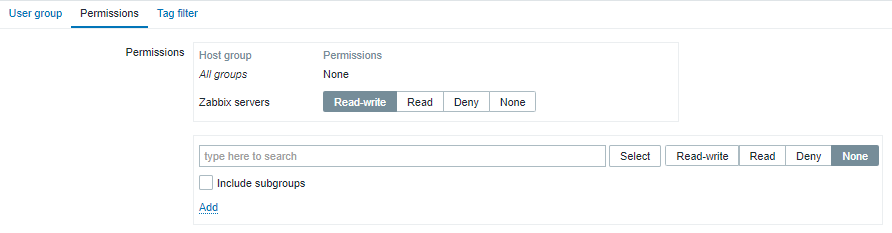
- Go to Administration > User groups > Create user group. Create a new user group and ensure that the group has Read-write permission.
- Go to Administration > Users > Create user.
- Give the user a name, associate it to the user group you created earlier and give it a password (this will not be used, but is a mandatory requirement on Zabbix).
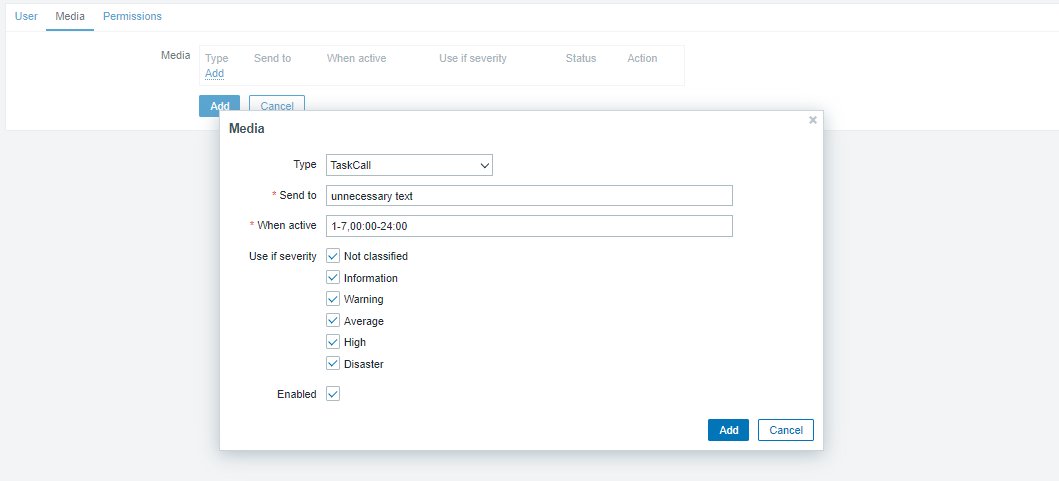
- Move to the Media tab on the form. Click the inner underlined Add button. A pop-up Media screen will appear. Select TaskCall as the Type. For Send to, just enter a random text (it is never used, but it is a requirement in Zabbix). Click Add.
- Click the Add button at the bottom of the user page to save the user.
- You are TaskCall integration is now ready. You can use this user in any Action to trigger alerts to TaskCall.
Trigger Action from Zabbix
If you have not used Zabbix before, it might be slightly time consuming to understand how triggers work since there are several steps involved. We have put together the steps here to help you get started. At first you will need to create an Action and then a Trigger on the host.
- Go to Configuration > Actions . Click the Create action button on the top right corner.
- Give the action a name and define the conditions that will determine it.

- Go to the Operations tab on the form. In the Operations field click Add.
- In the Operation details tab that pops up set the Operation type as Send message , add the TaskCall User you had created earlier in the Send to users section and select TaskCall in the Send only to section. Click Add.
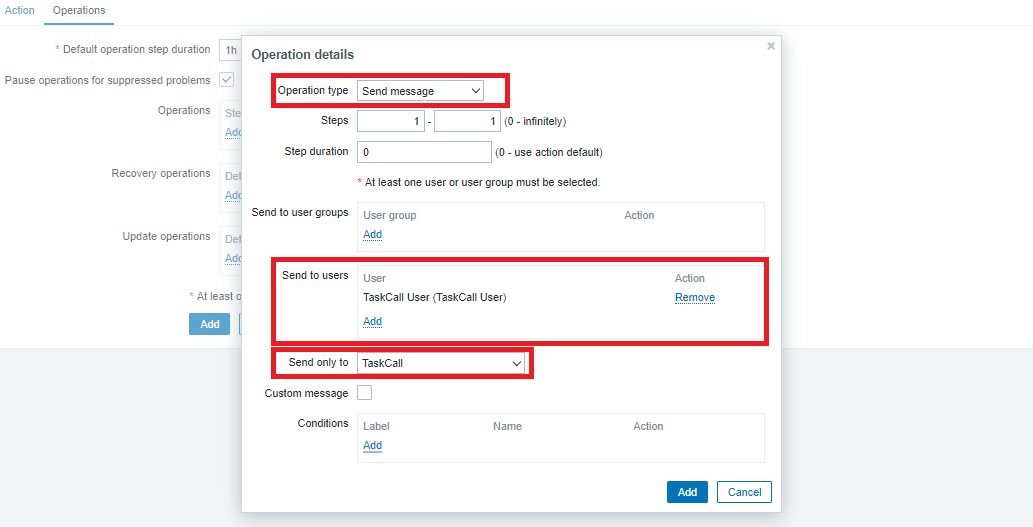
- Repeat this process for the Recovery operations and the Update operations to allow incidents in TaskCall to automatically resolve and sync up with Problems reported on Zabbix.
- Click the blue Add button to finish creating the action.
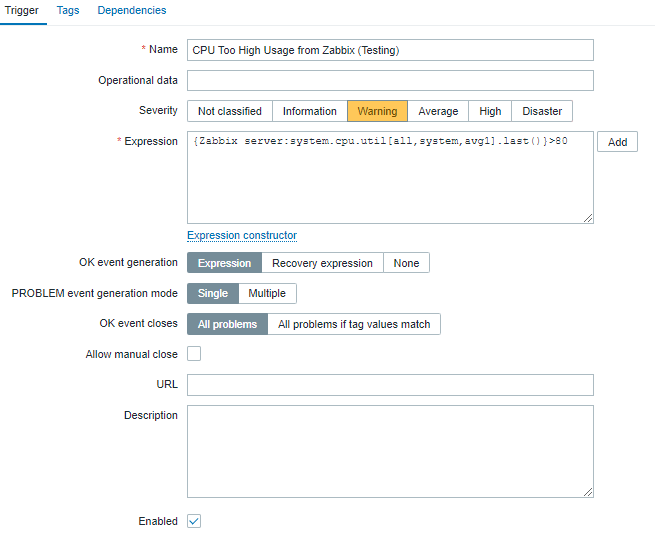
- Now to set up the trigger, go to Configuration > Hosts. On the host you want to create the trigger on, select Triggers.
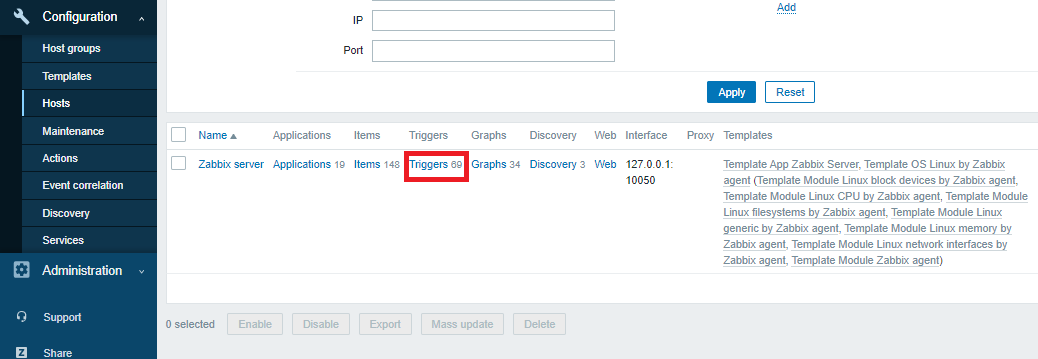
- Once you are on the triggers page, click the Create trigger button on the top right corner.
- Define the trigger according to your needs. Once you are done, click Add. If you need more help then please refer to Zabbix's own documentation on Triggers.
- That is it! You have fully set up Zabbix to direct triggers to TaskCall.