SAML-based SSO
Security Assertion Markup Language (SAML) is an XML standard for exchanging authentication/authorization data between an identity provider (IdP) and a service provider (SP). TaskCall's SAML-based SSO is built on the SAML 2.0 protocol. SAML 2.0 is one of the earlier protocols used for single sign-on. Many companies still use it as their defacto SSO protocol. This article will help you understand how TaskCall can be configured for SAML-based SSO.
Pointers
- TaskCall’s SAML-based SSO is based on the SAML 2.0 protocol.
- Users can sign into TaskCall with their IdP credentials.
- Users can be auto provisioned (auto registered) on TaskCall on their first sign in.
- Only the account Owner is able to configure SSO settings for the organization.
- SSO authentication can be enabled for only one identity provider at a time.
Configure SAML-based SSO
- Click on the dropdown mennu next to your profile picture on the top right corner of the navigation bar and select Organization. Only the Owner of the organization will be able to access the Organization page.
- Scroll down to the middle of the page and click on the Single Sign-On tab.
- Select the SAML radio button. Get the following information from your IdP and enter them in their respective fields:
- IdP entity ID: This is the unique identifier for your account from your IdP. TaskCall will use this to verify that SAML responses are coming from the correct source.
- X.509 certificate: This is also known as the SAML certificate and is issued by your IdP. Copy the text portion of the certificate from your IdP and paste it in TaskCall.
- Login URL: This is also known as the SSO login endpoint. It is the URL endpoint of your IdP where TaskCall will forward your login requests to for authorization.
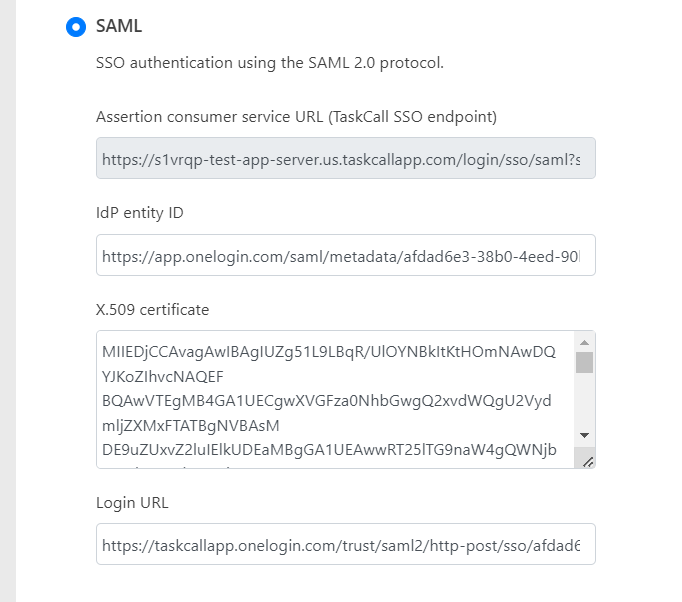
- Assertion consumer service URL (ACS URL) is the endpoint in TaskCall where your IdP will return the SAML response for assertion. You will need to provide this to your IdP. Please copy the ACS URL from TaskCall and enter it in the appropriate field in your IdP.
- Scroll down to the Additional Settings section.
- If you want the users to be able to log into TaskCall using both their SSO credentials and TaskCall credentials, then select the Allow login with TaskCall credentials checkbox.
- If you want to allow users to be able to auto-register on first sign in using their SSO credentials, then select the Allow auto provisioning checkbox. Do understand that this will impact your monthly billing as billing is done based on the number of users you have on your account in a given month.
- If you choose to enable auto provisioning, you must also select the default role to assign to the user when they are registered. Of course, you will be able to edit the user role after the user is registered if you want to.
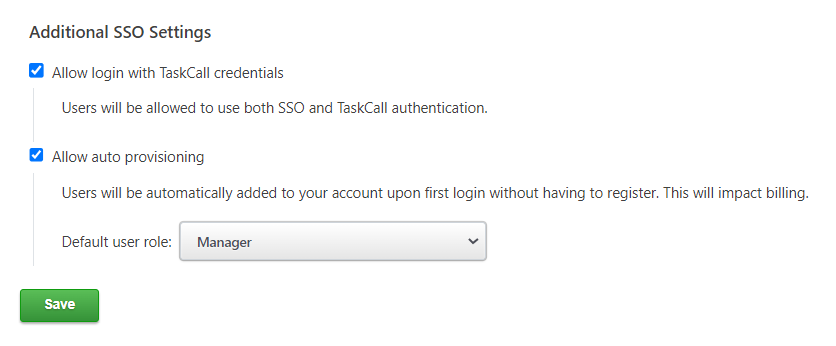
- Click Save once you are done and that’s it. You can now sign in with SAML 2.0 using your IdP credentials.